Top Ad 728x90

An older church friend passed down this 5-ingredient comfort meal where you just toss it all in and walk away. Every bite melts in your mouth with ric

by


This slow cooker 5-ingredient chicken pot pie is the kind of comforting church-supper recipe that gets passed from one kitchen to the next. An older friend from our little country church wrote it out for me on a stained index card years ago, telling me, “Honey, you just toss it all in and walk away.” It’s rich, creamy, and so tender you barely need a knife, with soft shredded chicken, peas and carrots, and golden crusty bits on top that give you that cozy pot pie feeling without any fuss. On busy days or cold evenings, this is the kind of simple, stick-to-your-ribs supper that makes the whole house smell like home.


Creamy chicken pot pie filling topped with golden biscuit pieces in a shallow bowl

Creamy chicken pot pie filling topped with golden biscuit pieces in a shallow bowl

Spoon the creamy chicken mixture onto warm plates and be sure each serving gets a few of those golden biscuit pieces on top. It’s lovely with a simple side salad or some sliced fresh tomatoes in summer, and steamed green beans or buttered corn in the colder months.


I like to serve it with a dish of cranberry sauce or applesauce on the table, the way church ladies always did, for a little sweet contrast. A glass of cold milk or iced tea fits right in, and if you want to stretch the meal, add a bowl of cottage cheese or some sliced bread-and-butter pickles alongside.


Slow Cooker 5-Ingredient Chicken Pot Pie


Servings: 6


Ingredients

2 pounds boneless skinless chicken breasts (or thighs)

2 (10.5-ounce) cans cream of chicken soup

1 (12-ounce) bag frozen peas and carrots

1 cup low-sodium chicken broth

1 (16-ounce) can large refrigerated biscuits

Directions

Lightly grease the inside of a 5- to 6-quart slow cooker with a bit of butter or cooking spray to help with cleanup.

Lay the boneless skinless chicken breasts (or thighs) in an even layer on the bottom of the slow cooker. They can overlap slightly if needed.

Raw chicken breasts arranged in a slow cooker insert

Raw chicken breasts arranged in a slow cooker insert

In a medium bowl, whisk together the cream of chicken soup and chicken broth until fairly smooth. It doesn’t have to be perfect; just break up the big lumps so it will melt down evenly.

Pour the soup and broth mixture evenly over the chicken in the slow cooker, making sure the chicken is mostly covered.

Sprinkle the frozen peas and carrots over the top. There is no need to thaw them; just spread them out so they’re fairly even.

Peas and carrots scattered over creamy chicken mixture in a slow cooker

Peas and carrots scattered over creamy chicken mixture in a slow cooker

Cover the slow cooker with the lid and cook on LOW for 6 to 7 hours, or on HIGH for 3 to 4 hours, until the chicken is very tender and shreds easily with a fork. Avoid lifting the lid during cooking so the heat and moisture stay inside.

About 30 minutes before serving, preheat your oven to 400°F (200°C). Open the can of refrigerated biscuits and cut each biscuit into 4 pieces. Spread the pieces out on an ungreased baking sheet, leaving a little space between them so they can crisp.

Cut biscuit pieces spaced on a baking sheet before baking

Cut biscuit pieces spaced on a baking sheet before baking

Bake the biscuit pieces for 10 to 14 minutes, or until they are puffed, deep golden brown, and crusty on the edges. Remove from the oven and let them cool slightly while you finish the filling.

Once the chicken is cooked through and very tender, remove the lid of the slow cooker. Use two forks to shred the chicken right in the pot, stirring it into the creamy sauce and vegetables until everything is well combined.

If the mixture seems too thick for your liking, you can stir in a splash more broth; if it seems too thin, leave the lid off and let it cook on HIGH for another 10 to 15 minutes to reduce slightly.


Taste the filling and, if desired, season lightly with salt and pepper. (The soup and broth often provide enough salt, so add carefully.)

To serve, spoon the hot, creamy chicken mixture onto plates or into shallow bowls. Top each serving with a handful of the warm, golden biscuit pieces so they sit on top like a crust. Serve right away while everything is hot and the biscuits are still crisp.

Shredded creamy chicken pot pie filling being stirred in the slow cooker

Shredded creamy chicken pot pie filling being stirred in the slow cooker

Variations & Tips


If you prefer dark meat, you can use boneless skinless chicken thighs instead of breasts; they stay especially moist and shred beautifully. For an extra homey flavor, you can use one can of cream of chicken and one can of cream of mushroom soup in place of the two chicken soups, keeping the total number of main ingredients at five. If your family likes more vegetables, swap the plain peas and carrots for a mixed vegetable blend, or stir in a cup of frozen corn during the last 30 minutes of cooking so it stays bright.


To add gentle seasoning without complicating things, sprinkle in a teaspoon of dried thyme or poultry seasoning with the soup and broth. For a richer dish, stir in a splash of heavy cream or a small knob of butter right before serving.


Finished chicken pot pie filling served with biscuit topping and a side of cranberry sauce

Finished chicken pot pie filling served with biscuit topping and a side of cranberry sauce

Food safety tips: Always start with fully thawed chicken if it was frozen; placing frozen chicken directly into a slow cooker can keep it at an unsafe temperature for too long. Make sure the chicken reaches at least 165°F (74°C) in the thickest part before shredding. Keep the slow cooker covered while cooking so the temperature stays steady. Refrigerate leftovers within 2 hours in shallow containers, and reheat until steaming hot before eating. Leftovers will thicken in the fridge, so you can loosen them with a spoonful of broth or milk when reheating on the stove or in the microwave.

Classic Moist Fruit & Nut Loaf

by


Ingredients 

2 cups (250 g) all-purpose flour1 tsp baking powder½ tsp baking soda½ tsp salt1 tsp cinnamon½ tsp nutmeg½ cup (115 g) butter, softened¾ cup (150 g) brown sugar2 large eggs1 tsp vanilla extract½ cup (120 ml) milk1 cup raisins½ cup dried cranberries or chopped cherries½ cup chopped walnuts or pecans¼ cup chopped candied cherries or mixed dried fruitInstructionsHeat oven to 175°C (350°F). Grease and line a 9×5-inch loaf pan.Whisk together flour, baking powder, baking soda, salt, cinnamon and nutmeg.Beat butter and brown sugar until light and creamy.Beat in the eggs one at a time, then add vanilla.Add the dry ingredients alternately with the milk. Mix just until combined.Fold in the raisins, cranberries/cherries and nuts.Pour into the loaf pan and smooth the top.Bake for 50–65 minutes, until a toothpick inserted in the center comes out clean or with a few moist crumbs.Cool in the pan for 10–15 minutes, then transfer to a rack and cool completely.✨ For an extra-moist loafSoak the dried fruit in ½ cup warm orange juice or milk for 20–30 minutes before adding it to the batter. This gives the cake that rich, soft texture shown in the photo.

Baby oil with this bicarbonate mixture

by


The promise is as tempting as it is simple: an affordable product, easy to obtain, and promising almost miraculous results. But, as a true skincare enthusiast, I know that behind these claims, one must examine them closely and, above all, with common sense.

First, let’s talk about the ingredients. Baby oil is basically a mineral oil, a highly refined petroleum derivative that acts as a powerful occlusive. This means it creates a physical barrier on the skin’s surface that locks in moisture and prevents it from evaporating. It’s excellent for retaining hydration.

However, it doesn’t provide active nutrients like vitamins or antioxidants. Sodium bicarbonate, on the other hand, is an ingredient with mild exfoliating and alkalizing properties. It can help remove dead skin cells and balance the skin’s pH, but when used excessively or carelessly, it can disrupt the skin barrier and cause irritation or dryness.

This can result in a more rested and youthful appearance. The key is to use it correctly and realistically.

Here’s a recipe based on the idea in the image, but with adjustments to make it safe and effective.

Recipe: Moisturizing and Softening Night Treatment

Ingredients: 1 tablespoon of baby oil (or pure mineral oil) and a very small pinch of baking soda (less than 1/4 teaspoon). If you have sensitive skin, substitute the baking soda with a teaspoon of very fine brown sugar, which is gentler.

Preparation and application: In the palm of your hand, mix the oil with the baking soda until you form a light paste. Apply this mixture to your clean, damp (freshly washed) face using gentle circular motions, avoiding the eye and lip areas. Leave it on for 5-10 minutes as a gentle mask. Then, remove the excess with a warm, damp cloth, without rubbing, just gently patting. You don’t need to rinse with soap, just remove any remaining oil that hasn’t been absorbed.

Instructions for proper use (This is crucial!):

Thorough cleansing beforehand: Oil traps everything it finds on the skin. If you apply this mixture to dirty or made-up skin, you’ll be sealing in impurities and bacteria, which can lead to breakouts. Wash your face with a gentle cleanser before applying the treatment.

Nighttime and limited use: The image suggests 21 days, which isn’t wrong, but I would recommend using it only 2-3 times a week, not daily. Baking soda can be drying if overused. Nighttime is the ideal time because the skin regenerates while we sleep.

Minimum amount: The image says “two drops daily,” and that’s good advice. A pea-sized amount is enough for your entire face. Don’t saturate your skin with oil, as this could clog your pores, especially if you have oily or combination skin.

Patch test: Before applying to your entire face, test the mixture on a small area of ​​your jawline or behind your ear and wait 24 hours. If you notice redness, itching, or irritation, do not use it. Everyone’s skin is different.

Extra hydration: After removing the mask, if your skin needs it, apply your usual moisturizer. Baby oil seals in moisture, but it doesn’t provide deep hydration on its own.

In short, this mixture can be a great ally in giving your skin extra softness and radiance, but don’t expect it to erase deep wrinkles or age spots overnight. It’s a complementary treatment, not a substitute for a complete routine that includes sunscreen, daily cleansing, and good hydration. Use it wisely, be consistent but not obsessive, and your skin will thank you with a more rested and healthy appearance. And remember, true youth isn’t just about your skin, but about how you feel on the inside!

My aunt gave me the

by


This 5-ingredient patty melt is my aunt’s late-night diner order brought straight into a home kitchen. She swears the secret is cooking everything in the same pan so the bread soaks up all that buttery, beefy flavor, giving you a crunchy, greasy exterior and a gooey, melty center. It’s simple enough for a weeknight, but tastes like something you’d grab at a little roadside diner after a long day.
Serve these patty melts hot off the pan on a simple oval plate with a handful of potato chips, fries, or a small green salad. A dill pickle spear and a little dish of ketchup or your favorite dipping sauce on the side make it feel like a true diner meal. For a cozy family night, pair with tomato soup or a quick veggie tray so everyone can balance that rich, cheesy sandwich with something fresh and crunchy.
5-Ingredient Patty Melt
Servings: 4

Ingredients
1 1/2 pounds ground beef (80/20 for best flavor)
2 large yellow onions, thinly sliced
8 slices sturdy sandwich bread or Texas toast
8 slices Swiss cheese (or your favorite melty cheese)
6 tablespoons salted butter, softened and divided
Directions
Shape the patties: Divide the ground beef into 4 equal portions. Gently shape each portion into a thin oval patty that’s about the same size and shape as your bread slices. Season both sides lightly with salt and pepper if you like, then set aside.
Cook the onions: In a large skillet over medium heat, add 2 tablespoons of the butter. When melted and sizzling, add the sliced onions and a pinch of salt. Cook, stirring often, for 12–15 minutes, until the onions are very soft, golden, and a little dark around the edges. If they start to brown too quickly, lower the heat. When done, push the onions to a plate and keep the skillet on the stove.
Cook the patties: In the same skillet (no need to wipe it out), increase the heat to medium-high. Add the beef patties and cook 3–4 minutes per side, or until nicely browned with crispy edges and cooked to your desired doneness. Transfer the cooked patties to a plate and turn the heat down to medium-low.
Butter the bread: While the patties rest, spread the remaining 4 tablespoons of softened butter evenly on one side of each bread slice. This is what gives you that greasy, golden crunch, so make sure you go all the way to the edges.
Assemble in the pan: Place 4 slices of bread, buttered side down, into the skillet. Top each with 1 slice of cheese, a generous scoop of the caramelized onions, one beef patty, and another slice of cheese. Cap each with a second slice of bread, buttered side up.
Grill the patty melts: Cook the sandwiches over medium-low heat for 3–4 minutes per side, pressing gently with a spatula, until the bread is deep golden brown and crisp and the cheese is fully melted and gooey in the center. If the bread is browning too fast, lower the heat and give the cheese more time to melt.

Serve: Transfer the patty melts to an oval plate and let them rest for 1–2 minutes so the cheese settles slightly. Slice in half if desired and serve hot, with the onions and melted cheese peeking out of the crunchy, buttery bread.
Variations & Tips
For picky eaters, you can skip the onions on their sandwich and simply add extra cheese. If your family prefers milder flavor, use American or mild cheddar instead of Swiss. To stretch the recipe, make smaller patties and use regular sandwich bread cut in half for kid-sized melts. For a slightly lighter version, use 90/10 ground beef and just 1 tablespoon of butter per sandwich, adding a quick spray of cooking oil to the pan if needed. If you love extra onion flavor, cook three onions instead of two and pile them high. For a classic diner twist, spread a thin layer of yellow mustard or Thousand Island dressing on the inside of the bread before grilling. You can also swap in rye bread for a more traditional patty melt taste, or use sourdough if that’s what you keep on hand. To make ahead for busy nights, cook the onions and shape the patties earlier in the day, then just sear, assemble, and grill when everyone’s hungry.

My Amish neighbor shared

by


This slow cooker 3-ingredient golden butter chicken is the kind of quiet Sunday dinner secret my Amish neighbor Mary would share over the fence while we’re hanging laundry. It’s as simple as tucking three humble ingredients into the crock, snapping on the lid, and letting time and patience do the work. The chicken turns out fork-tender, practically falling apart into a pool of rich, golden, savory butter juices that taste like you fussed all afternoon, even though you hardly lifted a finger. It’s the kind of plain, practical Midwestern comfort that fits right in on a farmhouse table after church or a long day in the fields.
Serve this golden butter chicken straight from the slow cooker, spooning the tender meat and buttery juices over fluffy mashed potatoes, egg noodles, or white rice so they can soak up every drop. Add a simple side of buttered corn, green beans, or a tossed salad to balance the richness. Warm dinner rolls or crusty bread are perfect for sopping up the sauce, and if you like, finish the meal the old-fashioned way with something simple and homey like applesauce or a slice of pie.
Slow Cooker 3-Ingredient Golden Butter Chicken
Servings: 6
Ingredients
3 pounds boneless, skinless chicken breasts (about 4–6 pieces)
1 cup (2 sticks) salted butter, cut into chunks
1 packet (1 ounce) dry onion soup mix
Directions
Lightly grease a 5- to 6-quart slow cooker or mist it with cooking spray so the chicken doesn’t stick and the edges brown nicely.
Lay the chicken breasts in a single layer in the bottom of the slow cooker. If you have to overlap a little, that’s fine, but keep them as flat as you can so they cook evenly and stay tender.
Sprinkle the dry onion soup mix evenly over the top of the chicken, making sure each piece gets a good dusting of seasoning. This is what gives you those deep, savory juices as it cooks.
Scatter the chunks of salted butter over the seasoned chicken, covering as much of the surface as you can. As it melts, it will create a rich golden sauce that the chicken will bathe in for hours.
Cover the slow cooker with the lid and cook on LOW for 5 to 6 hours, or until the chicken is very tender and easily pulls apart with a fork. Avoid lifting the lid during cooking so the heat and moisture stay trapped inside and the meat becomes as tender as possible.
Once the chicken is done, gently shred or pull it apart right in the slow cooker using two forks, or leave the breasts whole if you prefer. Spoon the buttery, golden onion juices over the top so every piece is well-coated.
Taste the sauce and add a little extra salt or black pepper only if needed. Serve the chicken warm, straight from the crock, with plenty of the rich butter juices ladled over each portion.

Variations & Tips
For a slightly lighter version, you can use 1 1/2 pounds chicken breasts and 1 1/2 pounds boneless, skinless chicken thighs together; the thighs add extra tenderness and flavor while still keeping the recipe to three ingredients. If you prefer a bit of color, you can quickly sear the chicken breasts in a skillet with a touch of butter before placing them in the slow cooker, though it’s not necessary—slow cooking will still give you beautifully tender meat. To stretch the meal, shred the finished chicken into the buttery juices and serve it over noodles or rice, or pile it onto toasted sandwich buns. If you like a creamier sauce, stir in a splash of heavy cream or a spoonful of sour cream just before serving, understanding that this technically adds another ingredient beyond the base three. For food safety, start with fully thawed chicken (never cook from frozen in the slow cooker), keep the lid on during cooking, and make sure the internal temperature of the chicken reaches at least 165°F (74°C). Refrigerate leftovers within 2 hours in a shallow container, and reheat thoroughly until steaming hot before serving again.

My neighbor brought

by


My neighbor Ruth brought this Amish-style chicken and green bean bake to a church potluck years ago, and I remember the way the room went quiet for a moment when folks took their first bite. Then the questions started flying: “Who made this?” and “Can I get that recipe?” No one could believe it was only four ingredients. It’s the kind of humble, oven-baked dish that feels right at home on a Midwestern table—simple pantry staples, a glass baking dish, and a little time in the oven until the edges bubble and brown.

Church potluck casserole dish on a folding table

This is comfort food you can put together in minutes on a busy evening, but it tastes like it’s been in the family for generations.

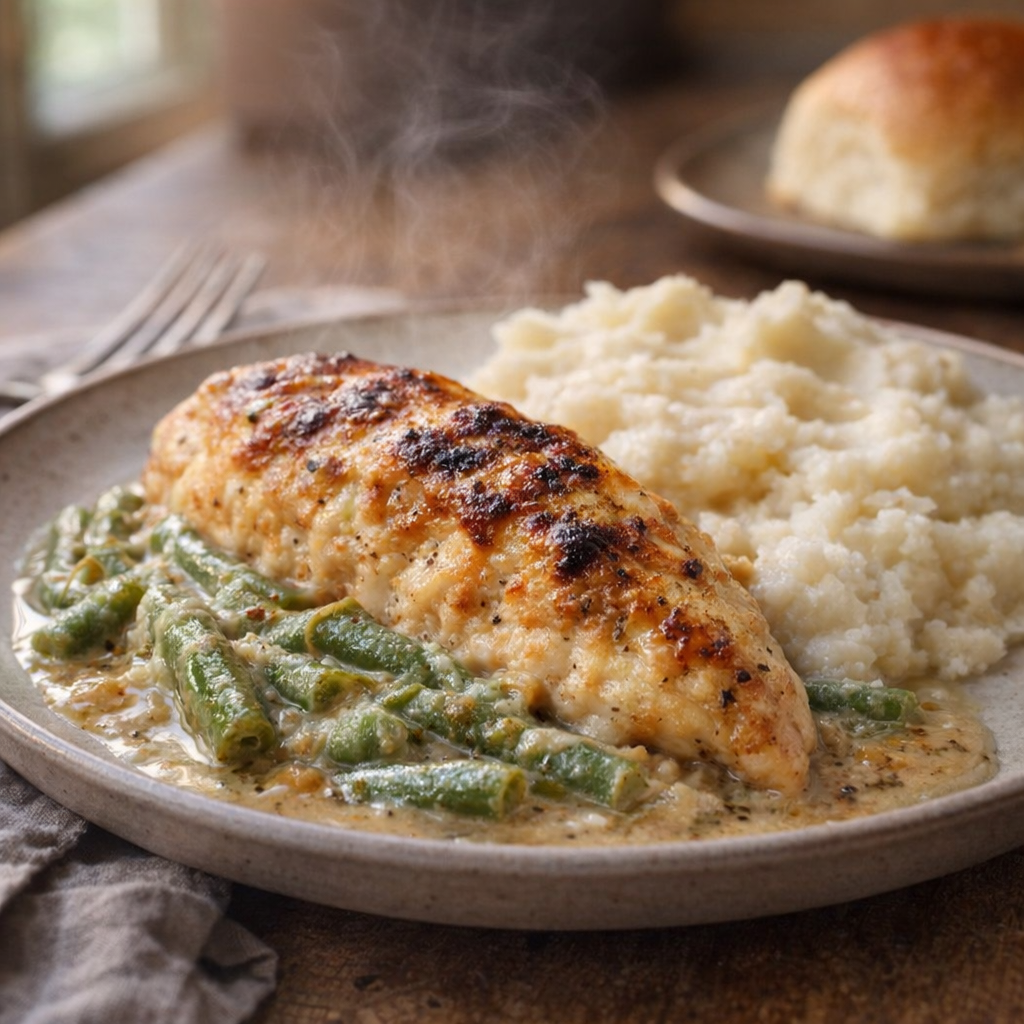
Serve this chicken and green bean bake straight from the glass dish while it’s still bubbling around the edges. It’s wonderful over a scoop of fluffy mashed potatoes or buttered egg noodles to catch the savory juices. A simple side of sliced tomatoes or a crisp lettuce salad with a light vinaigrette balances the richness. If you like, add a basket of warm dinner rolls or buttered bread to soak up every last bit of the sauce.

Oven Baked 4-Ingredient Amish Chicken and Green Bean Bake

Servings: 4


Ingredients

2 pounds bone-in, skin-on chicken thighs or drumsticks

1 (24-ounce) bag frozen cut green beans, unthawed
1 (10.5-ounce) can condensed cream of mushroom soup
1 (1-ounce) packet dry onion soup mix

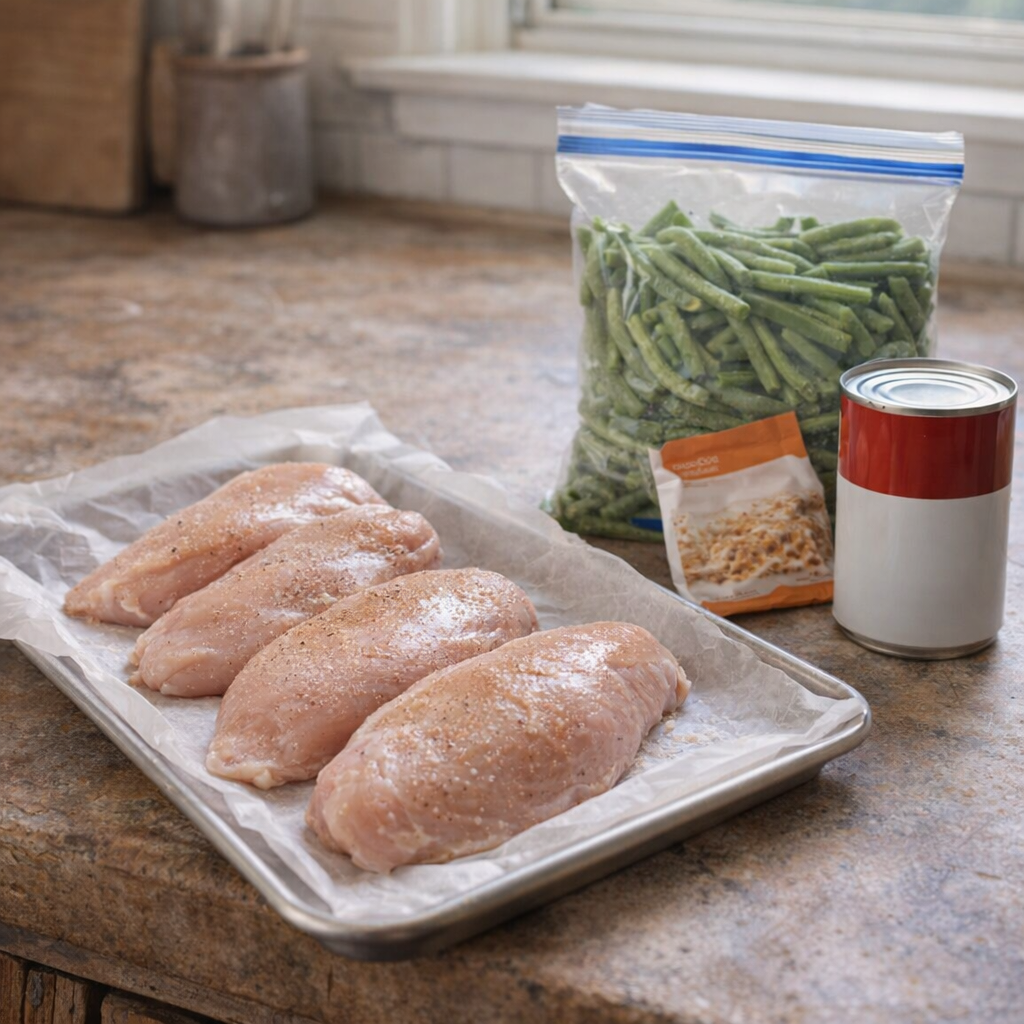
Four simple casserole ingredients on a farmhouse counter

Directions

Preheat your oven to 375°F (190°C). Lightly grease a 9x13-inch glass baking dish so the edges don’t stick as they brown.

Spread the frozen green beans in an even layer in the bottom of the glass baking dish. No need to thaw them first; they’ll cook up tender in the oven.

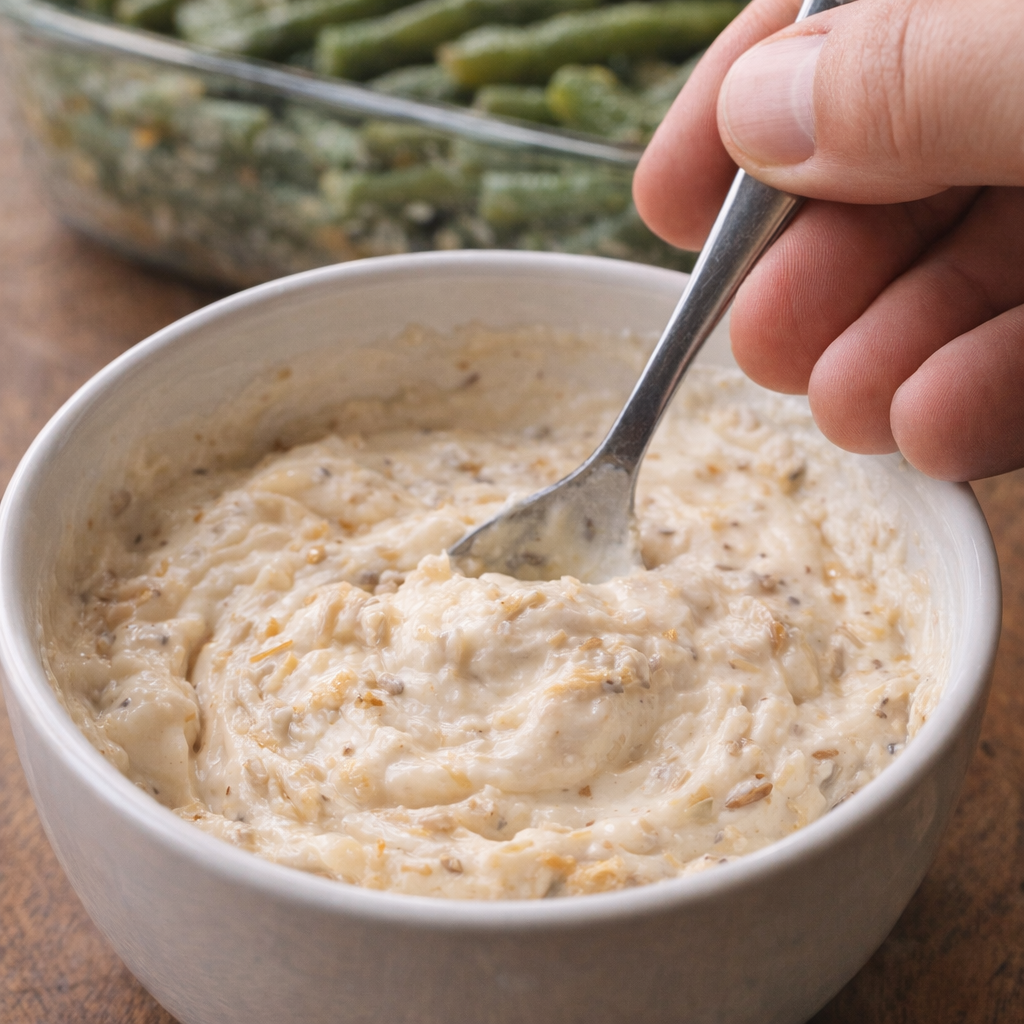
In a small bowl, stir together the condensed cream of mushroom soup and the dry onion soup mix until well combined. It will be thick and very flavorful.

Soup mixture being stirred in a small bowl

Spoon the soup mixture over the green beans and gently spread it so it covers most of the beans. Don’t worry if a few beans peek through; the juices from the chicken will mingle with the sauce as it bakes.

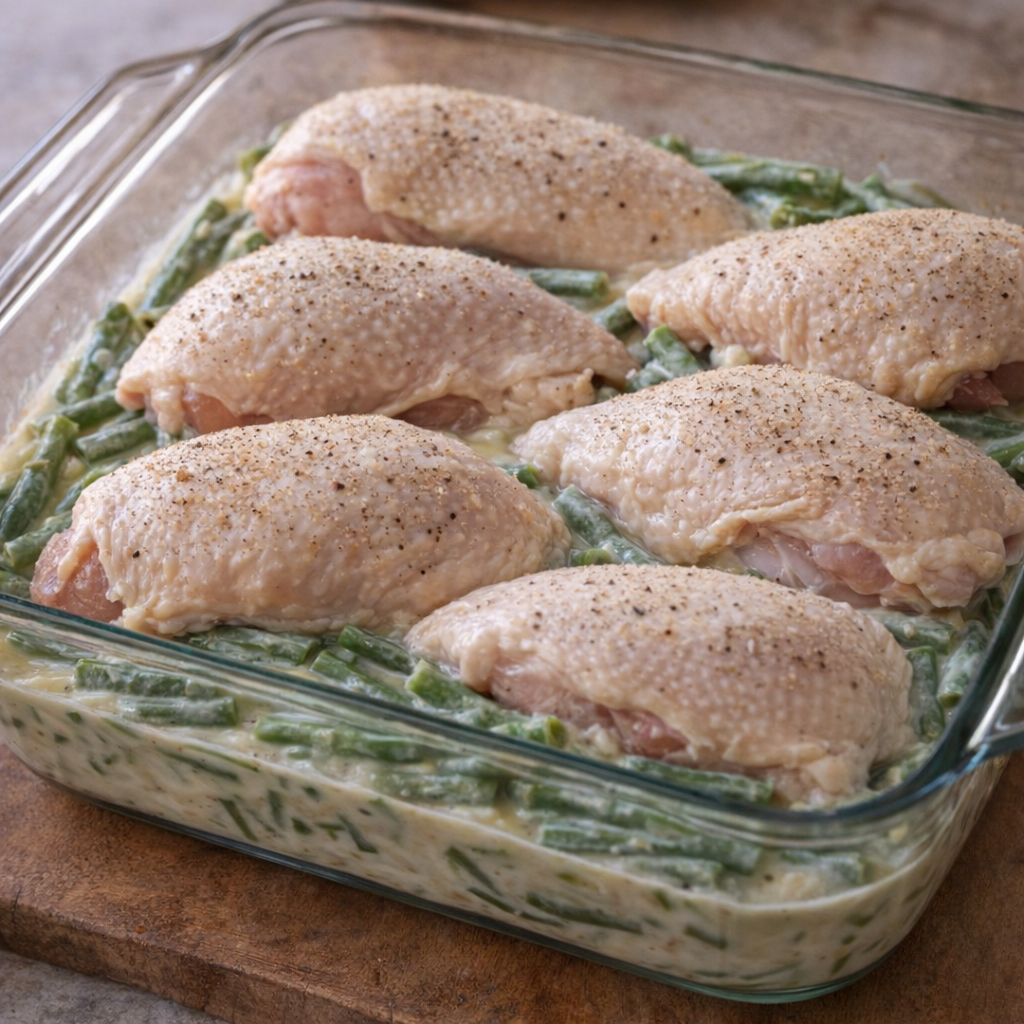
Pat the chicken pieces dry with paper towels and arrange them skin-side up on top of the sauced green beans, spacing them evenly so they brown nicely. Press them down just enough so they sit snugly in the sauce but still have the skin exposed.

Chicken arranged over green beans in glass baking dish

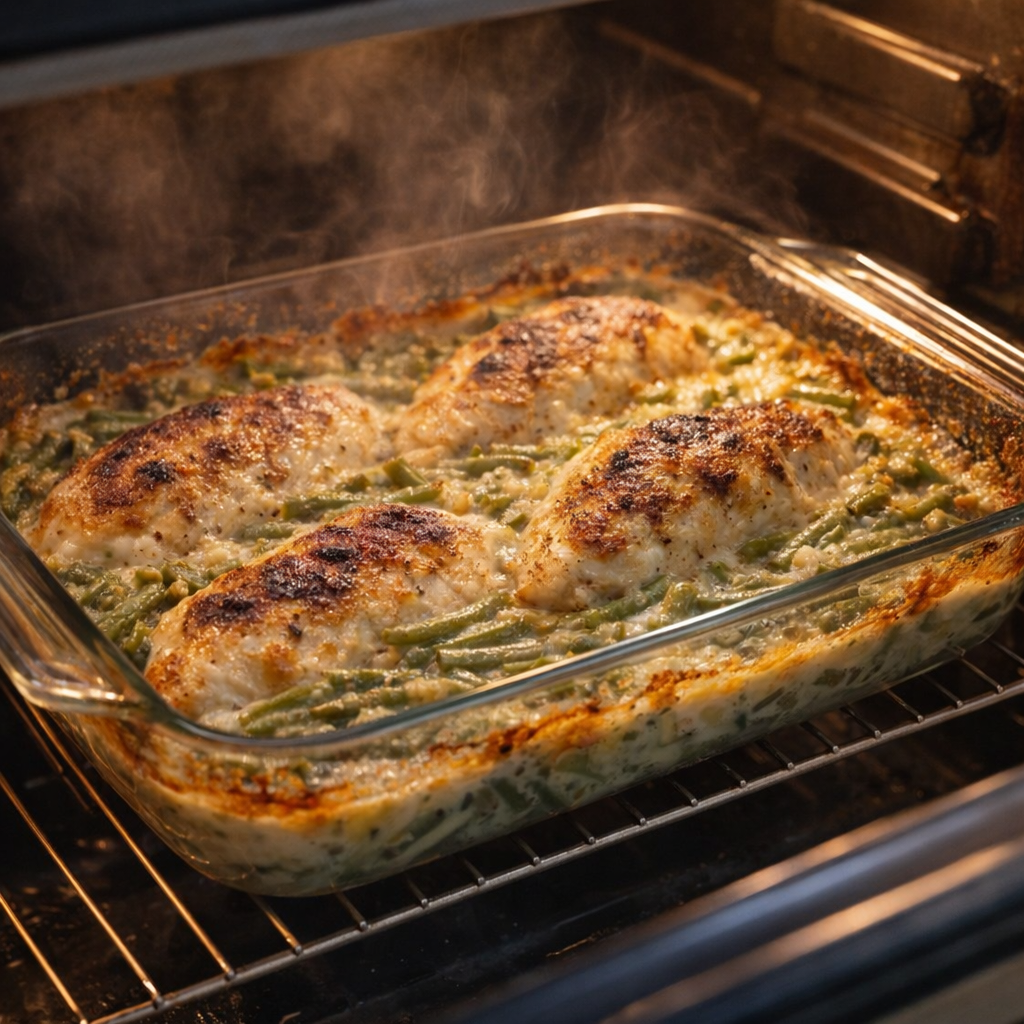
Place the baking dish on the middle rack of the preheated oven and bake, uncovered, for 50 to 60 minutes, or until the chicken is cooked through (an instant-read thermometer should read 165°F/74°C in the thickest part) and the skin is golden with browned edges. The sauce around the sides of the glass dish should be bubbling.

If you’d like the top a little more browned, move the dish to the top rack for the last 5 to 10 minutes of baking, watching closely so it doesn’t scorch.

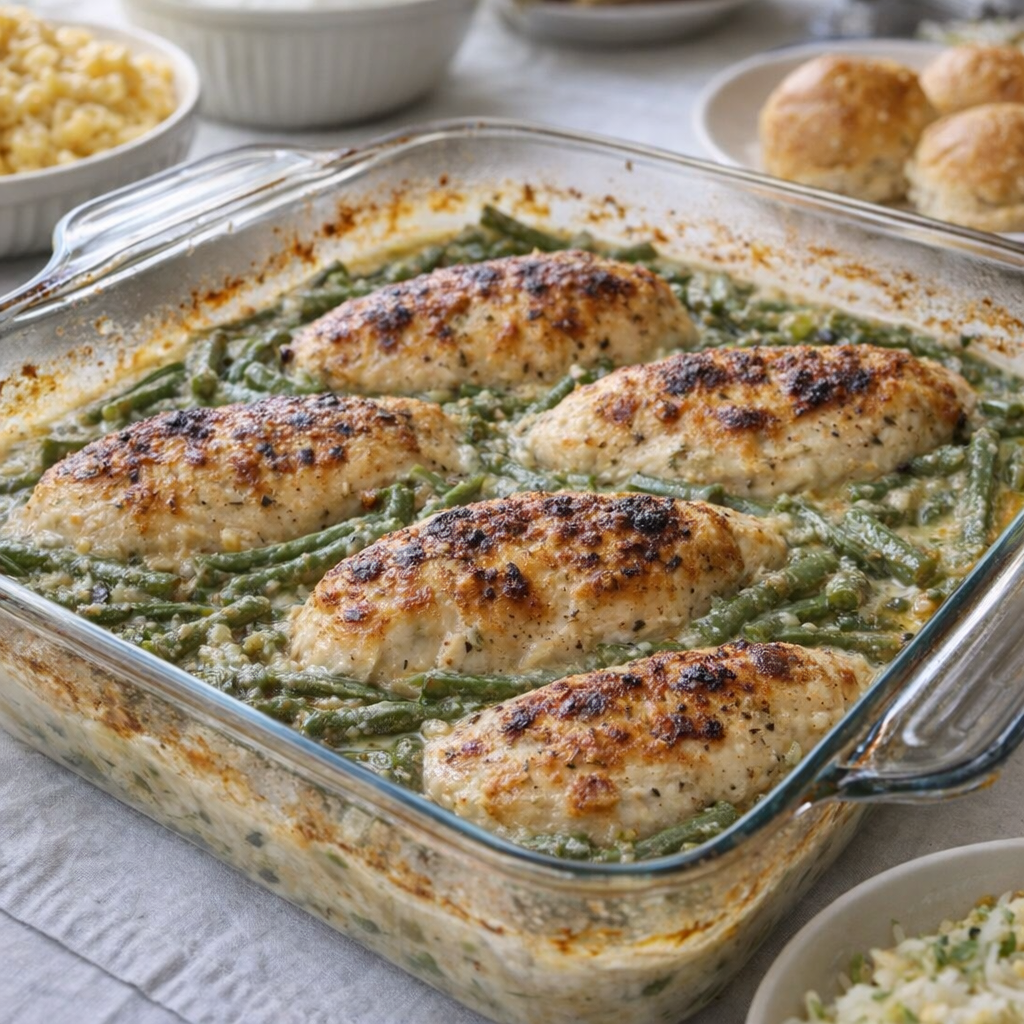
Freshly baked chicken and green bean casserole in the oven

Remove the dish from the oven and let it rest for about 5 minutes so the bubbling settles and the juices thicken slightly. Serve the chicken with a generous spoonful of the green beans and sauce from the bottom of the dish.

Variations & Tips

For a creamier dish, stir 1/4 cup of milk or half-and-half into the soup and onion mix before spreading it over the green beans (this technically adds a fifth ingredient, but it’s a nice option if you don’t mind stretching the rules).

You can swap the cream of mushroom soup for cream of chicken or cream of celery if that’s what you keep on hand; each gives a slightly different but still very homey flavor. If you prefer white meat, use bone-in, skin-on chicken breasts and check for doneness around 40 to 45 minutes so they don’t dry out.

For a bit more browning and texture, you can briefly broil the top at the end, watching carefully. To make cleanup easier, line the baking dish with a light coating of cooking spray before adding the green beans.

Served chicken and green beans on a dinner plate

Leftovers reheat well in a low oven, covered with foil, until warmed through; the flavors actually deepen by the next day. If you need to feed more people, you can snug a few extra chicken pieces on top and add another small handful of green beans underneath, but don’t crowd the pan so much that the chicken can’t brown.

My mom made this on busy

by


This 4-ingredient ground beef and veggie foil dinner is the kind of weeknight meal many of us grew up with in the Midwest—simple, cozy, and endlessly reassuring. My mom would slide these little foil packets onto a sheet pan, and by the time homework was spread across the kitchen table, dinner was quietly sizzling away in the oven. Opening that warm silver pouch at the table felt like unwrapping a personal present: a browned beef patty nestled into tender potatoes and sweet carrots, all bathed in savory juices. It’s budget-friendly, kid-approved, and a great entry point if you’re learning to cook or just need a no-fuss dinner that tastes like a hug in a bowl.
Serve each opened foil packet tipped into a shallow bowl so all the savory meat juices pool around the vegetables—this is where the magic is. A slice of buttered white or sourdough bread is perfect for soaking up every bit of broth. A simple green salad with a tangy vinaigrette balances the richness, or you can add steamed green beans or peas on the side for a little extra color and crunch. If you like condiments, set out ketchup, steak sauce, or a spoonful of sour cream so everyone can dress up their own bowl just the way they remember from childhood.
4-Ingredient Beef & Veggie Foil Dinner
Servings: 4

Ingredients
1 1/2 pounds ground beef (80–85% lean)
1 1/2 pounds russet or Yukon Gold potatoes, scrubbed and diced into 1/2-inch cubes
3 large carrots, peeled and sliced into 1/4-inch coins
1 (1.0-ounce) packet dry onion soup mix
Directions
Preheat your oven to 400°F (200°C). Tear off 4 large sheets of heavy-duty aluminum foil, each about 12x16 inches. If you only have regular foil, use a double layer for each packet so they don’t tear.
In a large bowl, add the diced potatoes and sliced carrots. Sprinkle about half of the dry onion soup mix over the vegetables and toss well with your hands until everything is lightly coated and the seasoning is evenly distributed.
Divide the seasoned potatoes and carrots evenly among the 4 sheets of foil, piling them in the center of each sheet into a small, even mound. This creates a vegetable “bed” that will catch the beef juices as they cook.
Place the ground beef in a separate bowl and sprinkle the remaining dry onion soup mix over it. Gently mix with your hands just until the seasoning is incorporated; avoid overworking the meat so the patties stay tender.
Divide the seasoned ground beef into 4 equal portions and shape each portion into a patty about 3/4 inch thick, slightly wider than the vegetable mound so the edges can drip juices over the vegetables as they cook.
Set one beef patty on top of the vegetables in the center of each foil sheet. If any onion bits from the soup mix are left in the bowl, tuck them over the patties or around the vegetables so nothing goes to waste.
Bring the long sides of one foil sheet up over the beef and vegetables so the edges meet. Fold the edges together tightly, then roll them down a couple of times to seal. Fold and crimp the short ends in the same way to form a snug packet, leaving a little space inside for steam to circulate. Repeat with the remaining packets.
Arrange the foil packets on a rimmed baking sheet in a single layer. Transfer to the preheated oven and bake for 35–45 minutes, depending on how finely you chopped your vegetables and how thick the patties are. The beef should be fully cooked through and the potatoes and carrots should be very tender when pierced with a fork.
Carefully remove the baking sheet from the oven and let the packets rest for 5 minutes; they will be very hot and still steaming inside. To serve, place a warm bowl in front of each person, open each packet cautiously away from your face to avoid the steam, and slide the beef patty and vegetables, along with all those savory juices, into the bowl.
Taste and adjust at the table if you like—these packets are lovely with a little extra black pepper, a splash of steak sauce, or even a small pat of butter melting over the hot vegetables. Eat straight from the bowl for the full nostalgic, warm-hug experience.

Variations & Tips
To keep the spirit of the original weeknight foil dinners, I like to treat this recipe as a base that you can nudge in different directions without complicating it. For a slightly lighter version, you can swap in lean ground turkey or chicken; just be aware they’re leaner, so adding a teaspoon of oil or a tiny pat of butter to each packet will help mimic the rich juices you get from beef. If you want more vegetables without changing the core four ingredients, serve the packets over a bed of steamed green beans or frozen peas that you’ve quickly microwaved with a pinch of salt. For an outdoor spin, these packets do beautifully on a medium grill—place them over direct heat for about 25–30 minutes, turning once halfway through, until the vegetables are tender and the patties are cooked through. You can also play with texture and cut size: smaller potato dice and thinner carrot slices cook faster and get softer, while slightly larger cuts hold their shape and give you more bite. Finally, if your family likes a saucier result, pour a few tablespoons of low-sodium beef broth into each packet before sealing; it will mingle with the beef drippings and onion seasoning to create extra “gravy” at the bottom of the bowl.

Cheesy Chicken Fritters

by


Cheesy Chicken Fritters: A Crispy, Gooey Delight

If you’re looking for a snack or appetizer that combines crispy golden perfection with melty, cheesy goodness, Cheesy Chicken Fritters are an unbeatable choice. These bite-sized delights are packed with tender chicken, gooey cheese, and flavorful herbs. Perfect for family dinners, parties, or a cozy snack, this recipe is simple yet irresistible.

Ingredients

For about 12–15 fritters, you will need:

  • 2 cups cooked chicken, shredded (rotisserie chicken works great)
  • 1 cup shredded cheddar cheese (or a blend of mozzarella and cheddar for extra gooeyness)
  • ½ cup grated Parmesan cheese
  • 2 large eggs
  • ½ cup all-purpose flour
  • ½ cup breadcrumbs (panko breadcrumbs give extra crispiness)
  • 2 cloves garlic, minced
  • 1 small onion, finely chopped
  • 2 tablespoons fresh parsley, chopped
  • 1 teaspoon paprika
  • ½ teaspoon black pepper
  • ½ teaspoon salt
  • Oil for frying (vegetable or canola oil works best)

Step-by-Step Method

Step 1: Prepare the Chicken Mixture

  1. In a large mixing bowl, combine the shredded chicken, cheddar cheese, Parmesan, minced garlic, chopped onion, and parsley.
  2. Add paprika, salt, and black pepper. Mix thoroughly so the spices and herbs are evenly distributed.

Step 2: Bind the Fritters

  1. Crack the eggs into the bowl and mix until the ingredients start to stick together.
  2. Gradually add the flour and breadcrumbs, folding gently until the mixture holds shape but isn’t too dry. You want a slightly sticky consistency that can be formed into patties.

Step 3: Shape the Fritters

  1. Scoop a handful of the mixture (around 2 tablespoons) and shape it into small, round patties or slightly flattened disks.
  2. Place them on a plate lined with parchment paper.

Step 4: Heat the Oil

  1. Pour about ¼ inch of oil into a large frying pan and heat over medium heat.
  2. Test the oil by dropping a small piece of the mixture in — it should sizzle immediately.

Step 5: Fry the Fritters

  1. Carefully place the fritters into the hot oil, making sure not to overcrowd the pan.
  2. Fry for 3–4 minutes on each side, or until they are golden brown and crispy.
  3. Remove them with a slotted spoon and drain on paper towels to remove excess oil.

Step 6: Serve and Enjoy

  1. Serve hot with your favorite dipping sauce — ranch, garlic aioli, or spicy ketchup all pair wonderfully.
  2. Garnish with extra parsley or a sprinkle of Parmesan for an elegant touch.

Tips for the Perfect Cheesy Chicken Fritters

  • Cheese choice matters: A mix of cheddar and mozzarella melts beautifully while adding sharp flavor.
  • Don’t skip the breadcrumbs: They give the fritters a satisfying crunch.
  • Keep the oil at the right temperature: Too hot and the fritters will burn outside and stay raw inside; too low and they’ll absorb too much oil.
  • Make them ahead: You can shape the fritters in advance and refrigerate for up to 24 hours. Fry them just before serving.

Cheesy Chicken Fritters are a crowd-pleaser for a reason: they combine crispy exterior, tender chicken, and rich, melty cheese in every bite. Whether you serve them as an appetizer, snack, or part of a meal, they’re guaranteed to disappear quickly!


If you want, I can also give a baked version of these fritters that’s lighter but just as cheesy and crispy. Do you want me to do tha

Top Ad 728x90